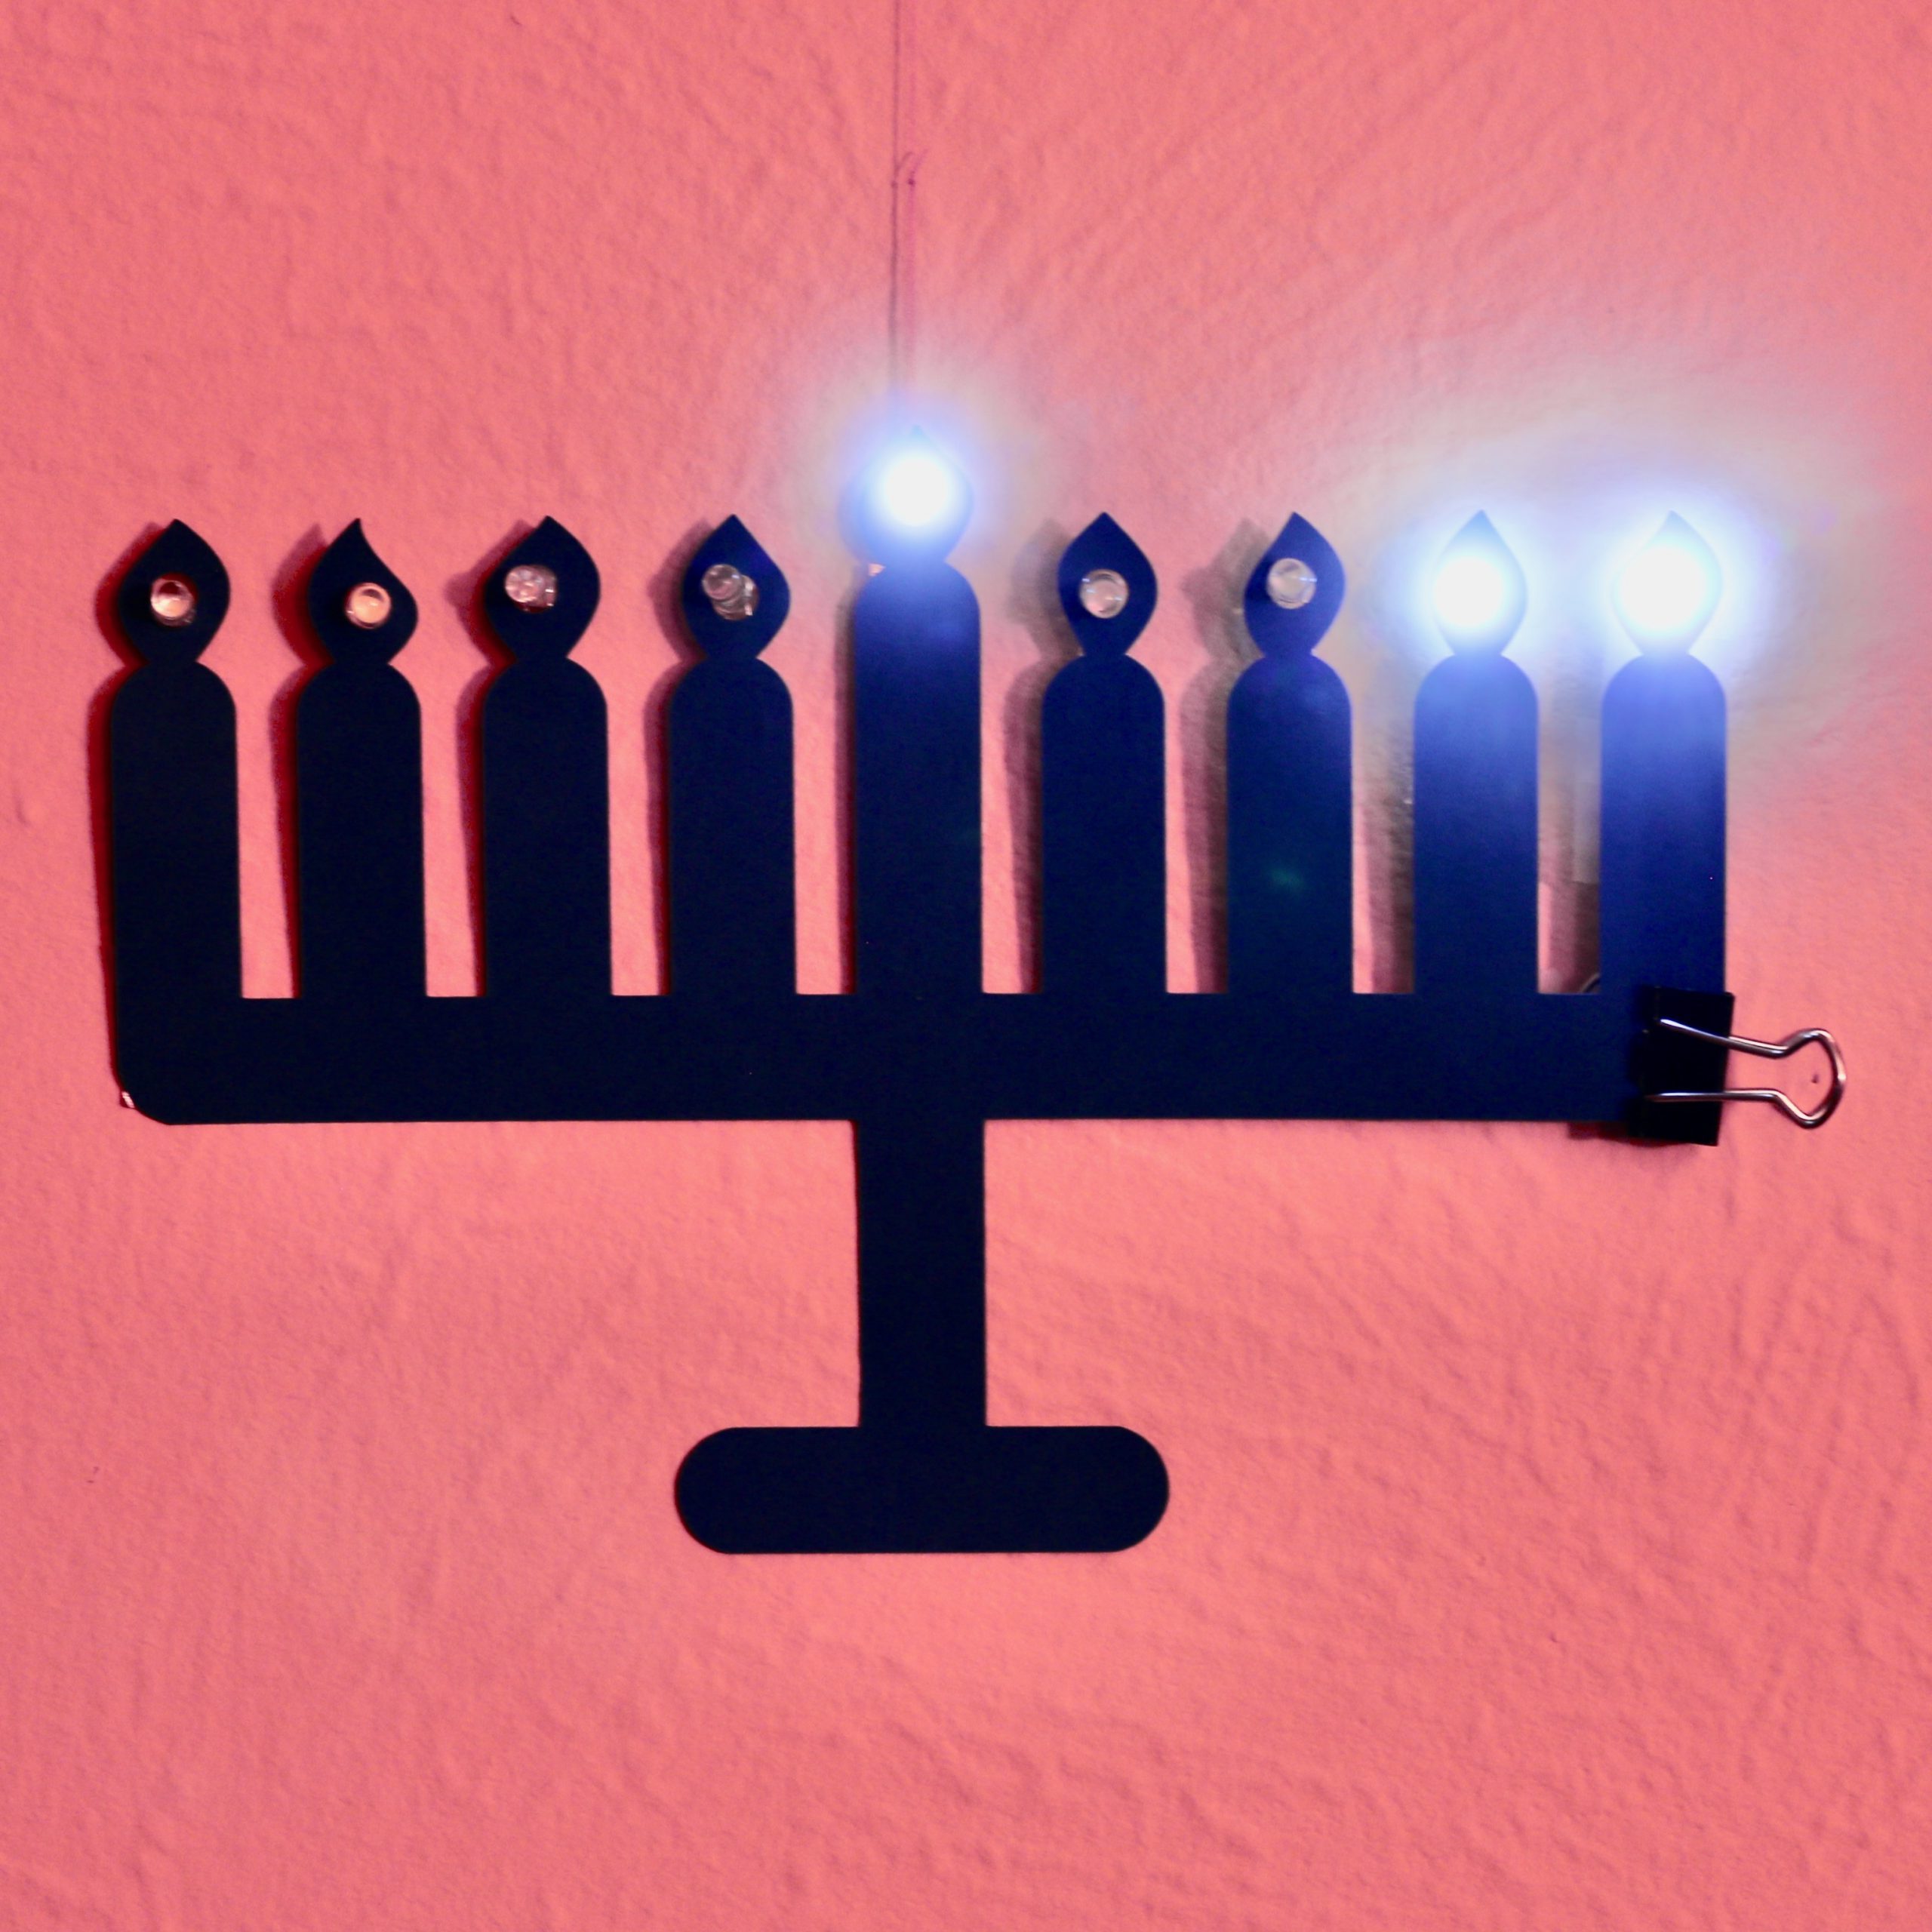
A paper circuit menorah is a fun decoration for Hanukkah with some great STEAM learning built in.
You can start with our template or build your own. The design is simple enough to allow for quite a bit of creativity, just make sure you leave room for two lines of tape and keep track of how much tape you’ll need.
Supplies
- 1 piece of blue card stock
- 4.5 feet of copper tape
- 9 LEDs
- Coin Cell Battery
- Clear tape
- Scissors
You can purchase a menorah kit in our shop.
Getting Started
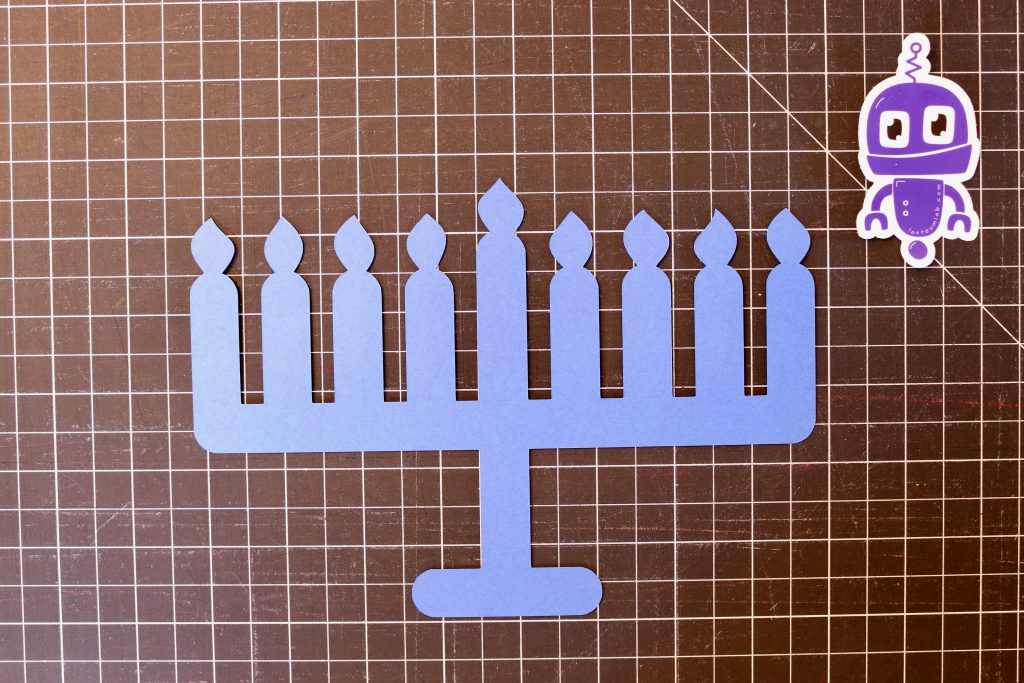
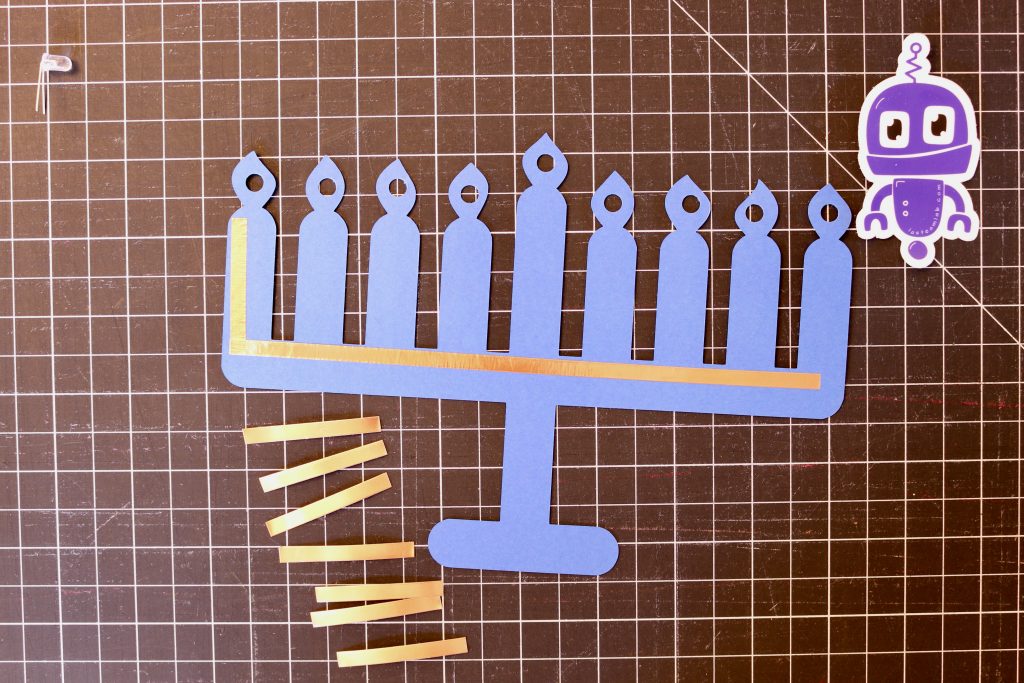
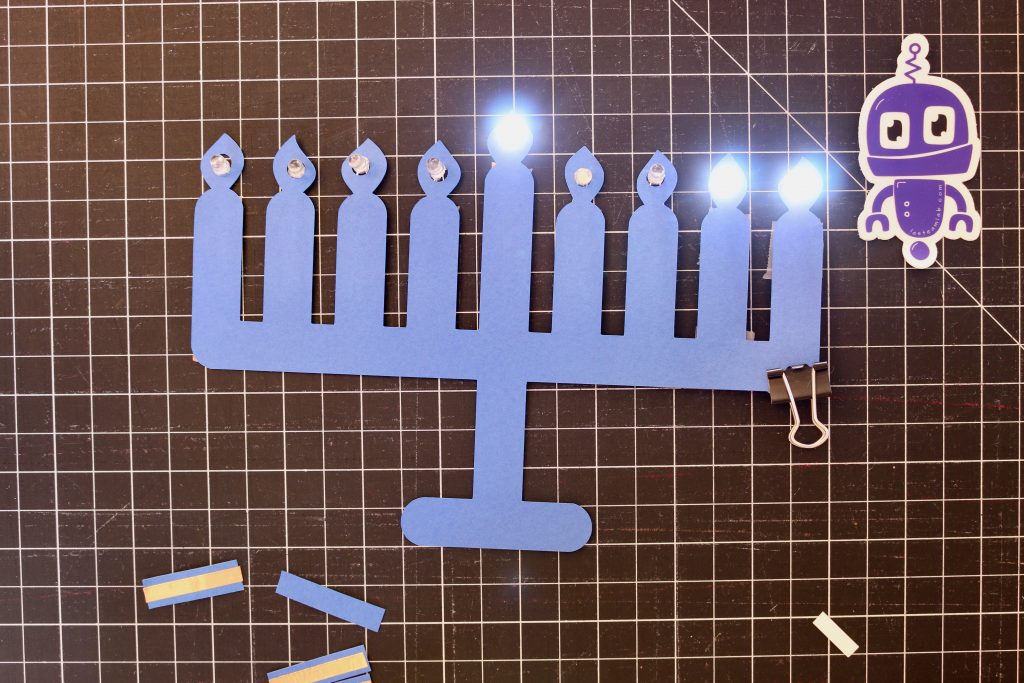
- Cut out your menorah.
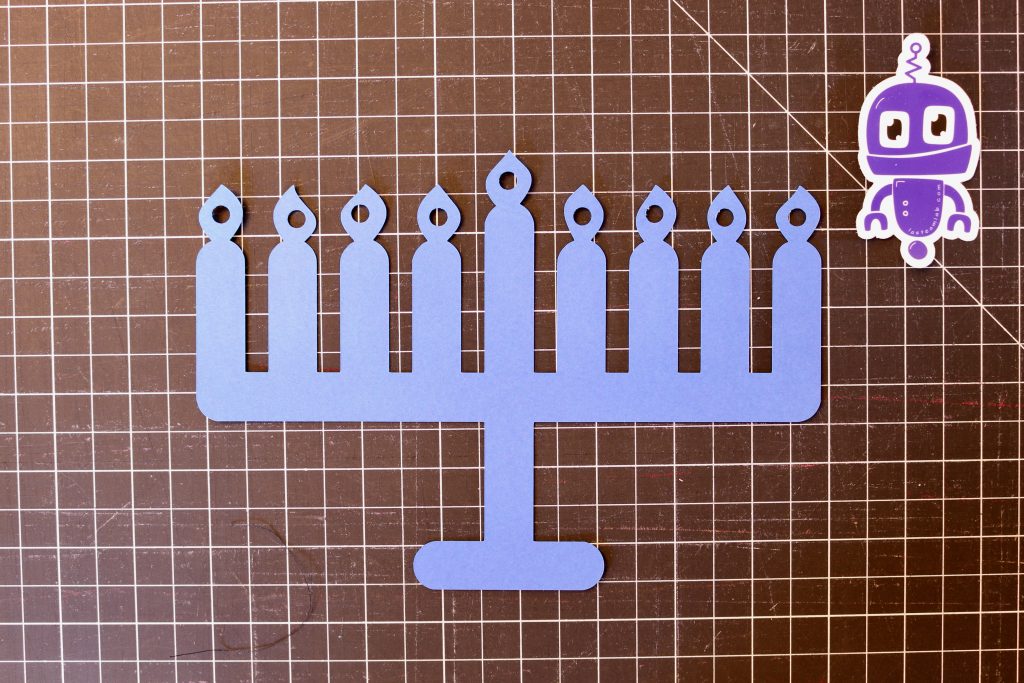
- Hole punch your lights.
Adding the Negative Bus
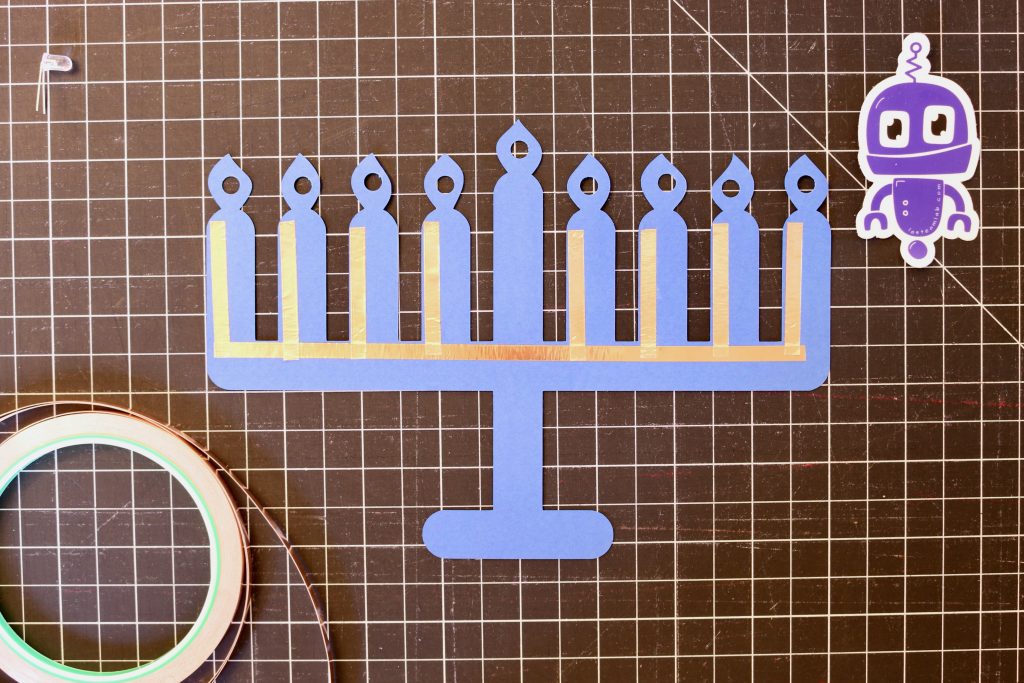
- The bus is the line that lets the power travel from the battery to all of the candles (think of each line that comes off of them as a bus stop). This is also an oversimplification of a convenient word borrowed from computing.
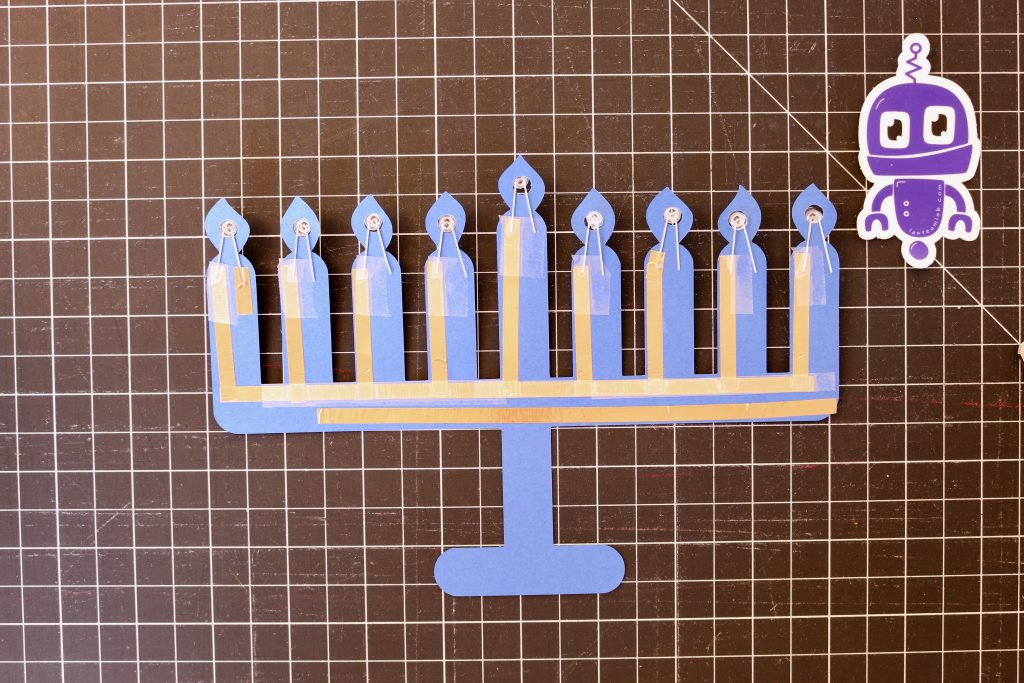
- Add a horizontal strip of copper tape going across the menorah. It should be on the top half of the strip and go from the left to the middle of the right-most candle.
- Add another piece for each candle going from the bus up to the top on the left side of each candle. They need to go higher than you think in order to reach the negative lead on the LEDs.
- Do this for the shamash as well (not pictured).

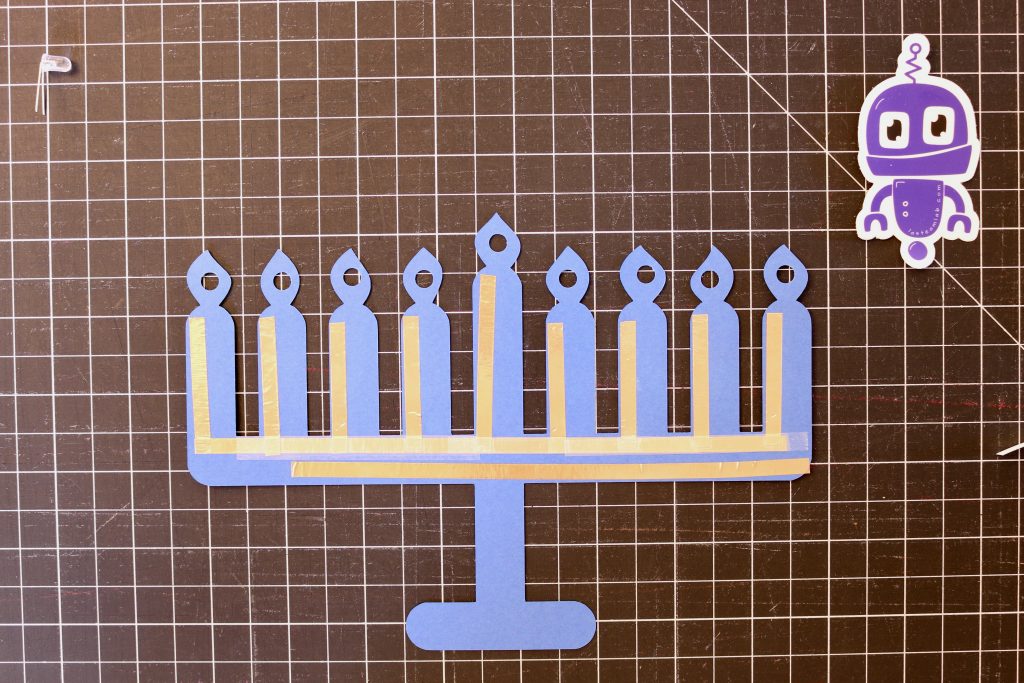
Adding the Positive Bus
- Add another horizontal strip of copper tape below the first. It should run from halfway through the second candle to the right side.
- Cover the negative (first) bus in clear tape. This will allow us to cross it to reach the positive bus. As pictured, you’ll need to split the clear tape in half down the center to not cover the positive bus. It may be easier to do this before laying down the positive bus, but the copper tape may not stick to the clear tape as well.

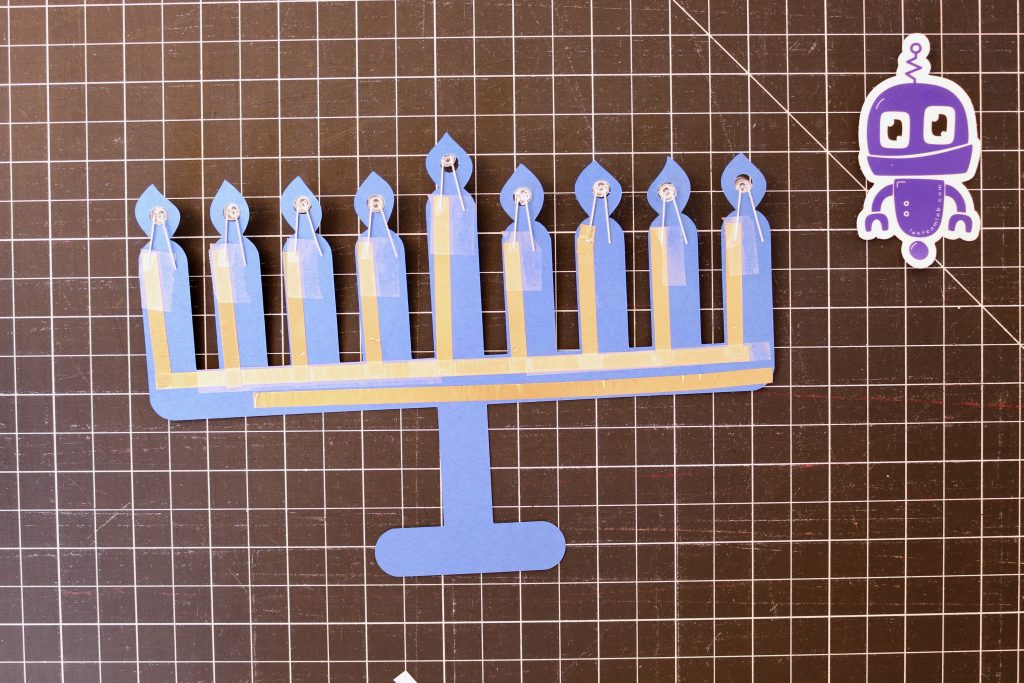
Adding the LEDs
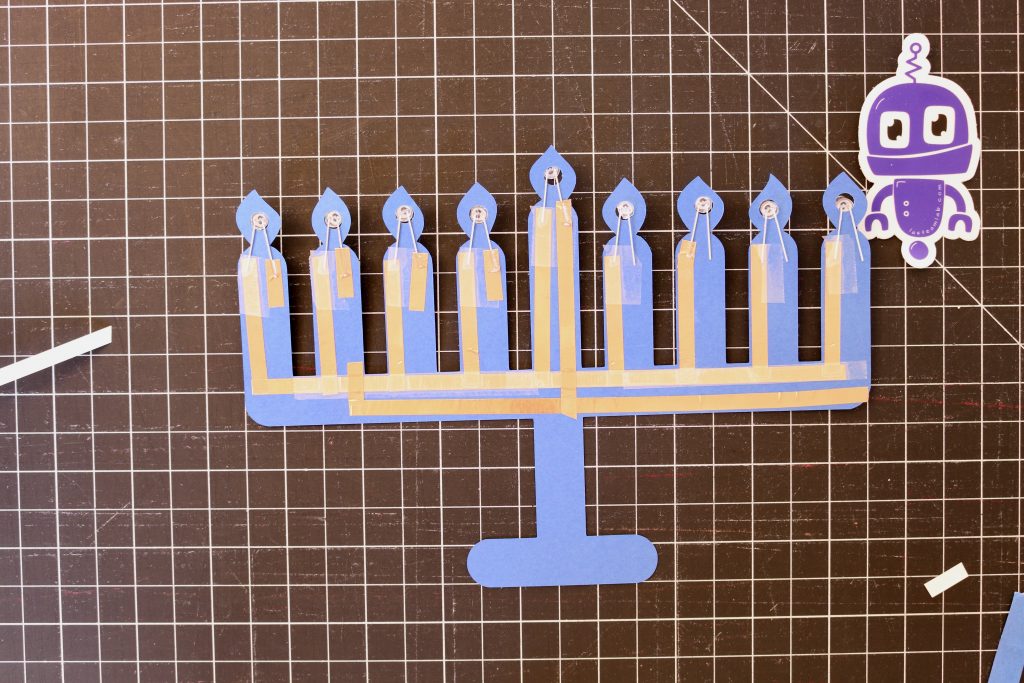
- One at a time, place each LED in the punched hole and bend the negative (shorter) end down to touch the copper tape. Tape it in place with clear tape.
- Use a 2 1/2 – 3″ piece of tape to tape down the positive lead of the shamash and attach it to the positive bus.
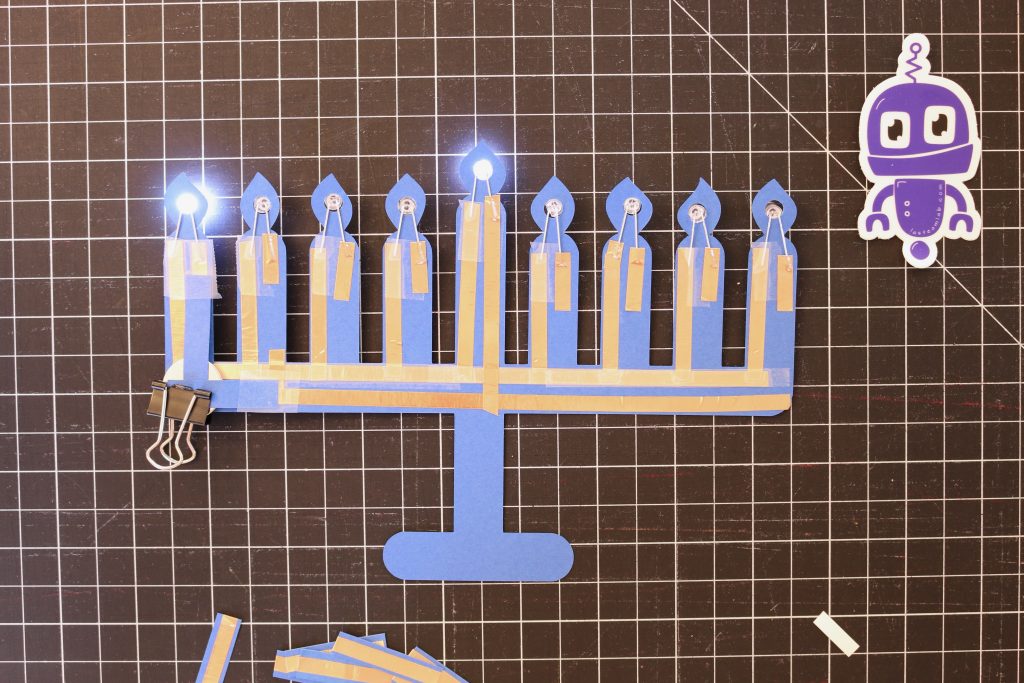
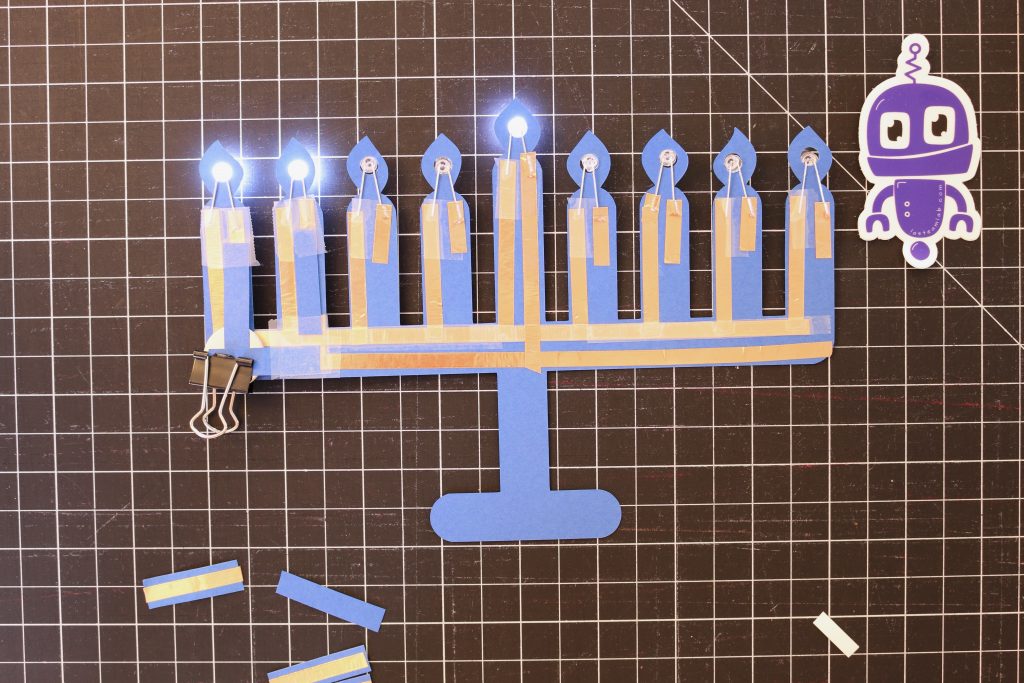
- Use an approximately 3/4″ piece of copper tape to tape down each of the LEDs on the remaining candles. We won’t attach them to the bus, because we want to be able to “light” them individually.
- Use another small piece of copper tape at the bottom of the second candle to carry the positive power across the negative bus. (See the picture). This is because we’ll block access when we add our battery.

Adding Power
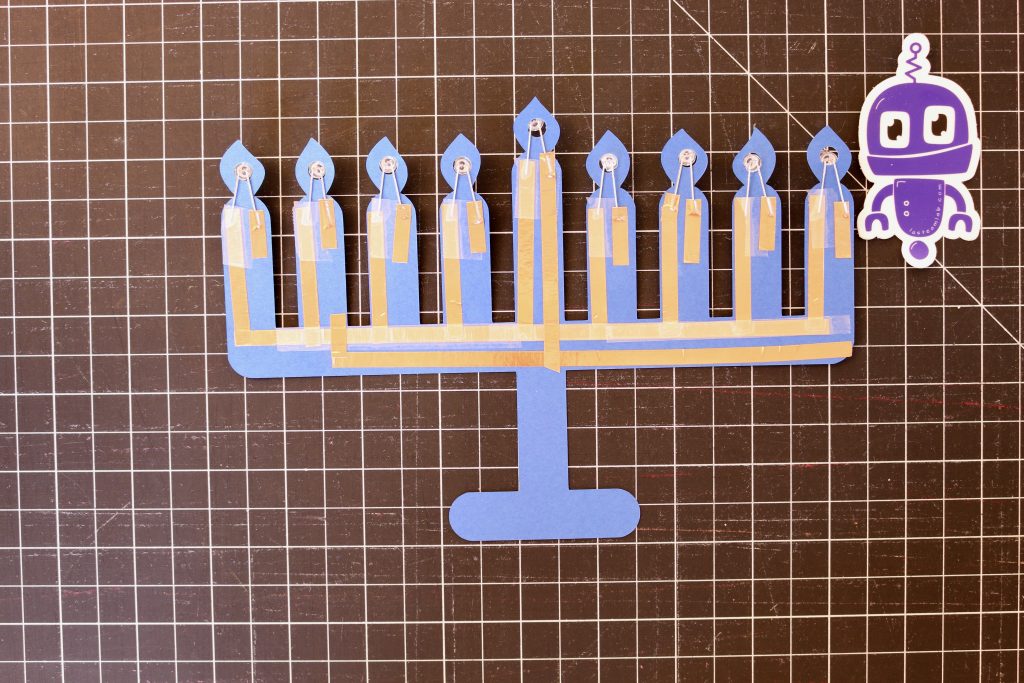
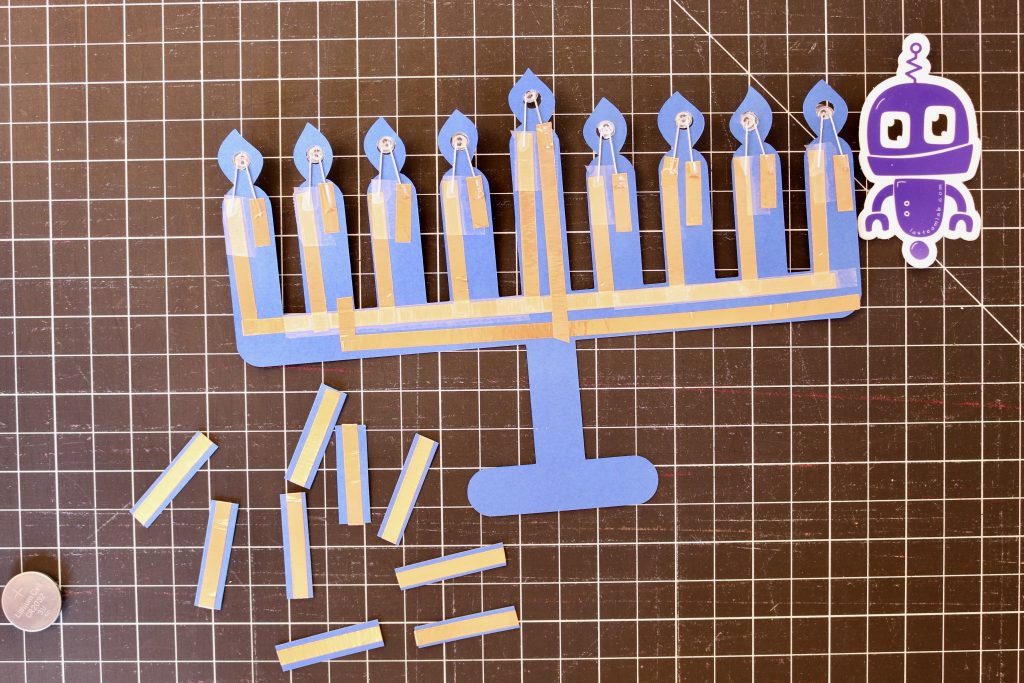
- Create eight 1 1/2″ strips of card stock with copper tape on them. Cut an additional 2″ one.
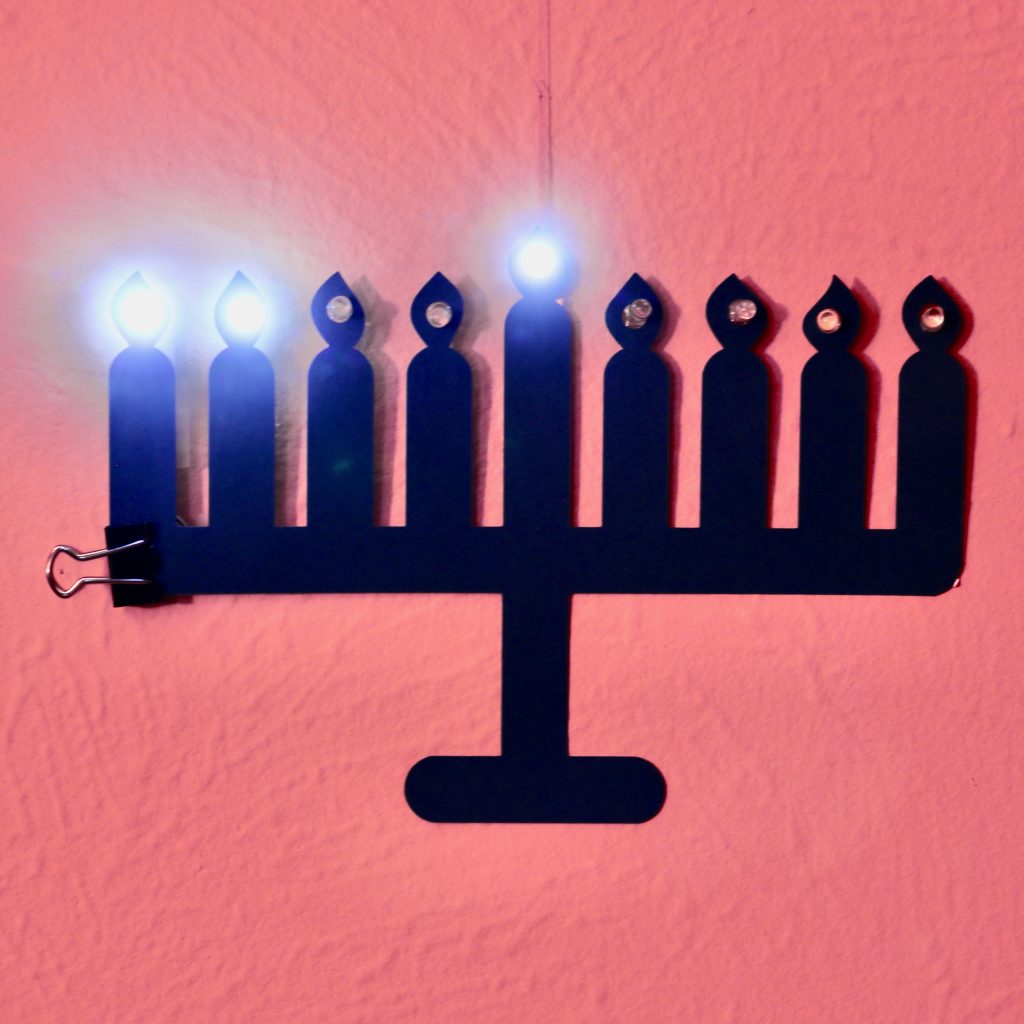
- Tape the 2″ strip to the positive bus connecting it to the battery (living in the bottom left corner. This should light the shamash.
- To light additional candles tape down each strip attaching the LED to the positive bus.
- For the left most candle, you’ll tape it at the top, but clip it directly to the battery at the bottom.
Share your work!
Share your finished designs to Instagram with tags #lasteamlab and #papercircuits, to our Facebook group, or in the comments below.
You can find more paper circuit tutorials and other fun projects on our curriculum page.